3d triangle drawing to cut out template
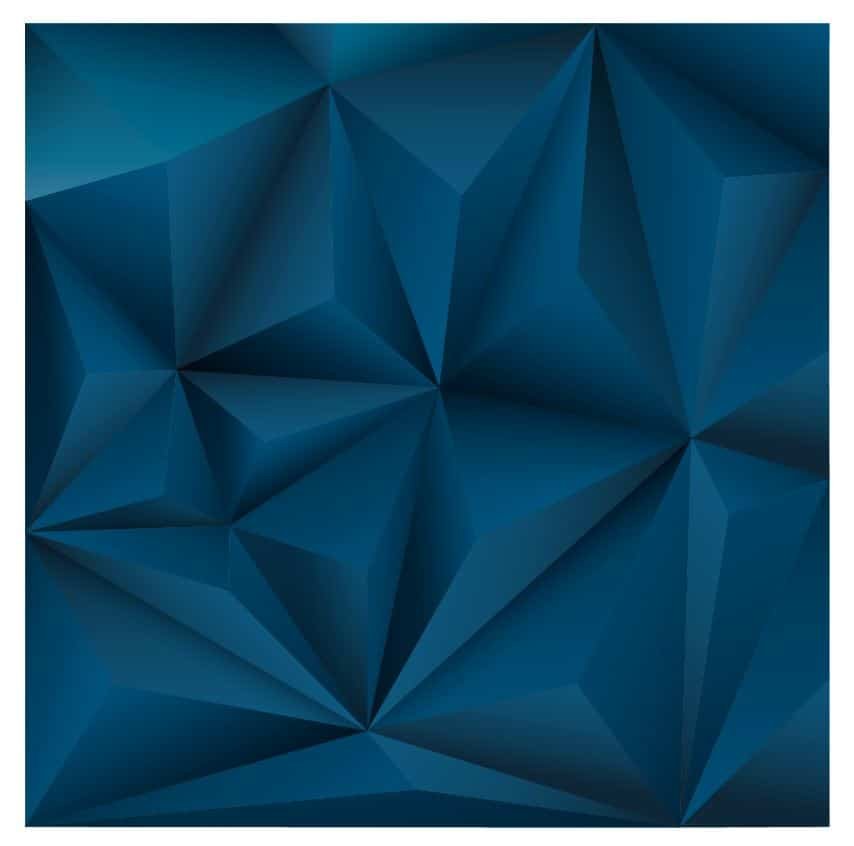
Tutorial: Vector 3D Triangle Outcome
- Writer: Freepik.com
- Programme: Adobe Illustrator
- Difficulty: Intermediate
- Topics Covered: Shape Building, Linear Gradients, Blending mode
- Estimated Completion Time: approx. 45 minutes


Step ane : Create the Certificate.
Let´due south create an 800 ten 800 pixels certificate (cmd + Due north) every bit an example! We recommend that the artboards size remains relatively small because if non the software could crash under also much information.
Step 2 : Construct the Triangles.
To avert mistakes, you lot have to create multiple layers (cmd + L). In the kickoff layer you can showtime creating the starting time triangles. The shapes must exist exaggerated to make the effect more articulate and each side of the triangle has to be a split up slice.
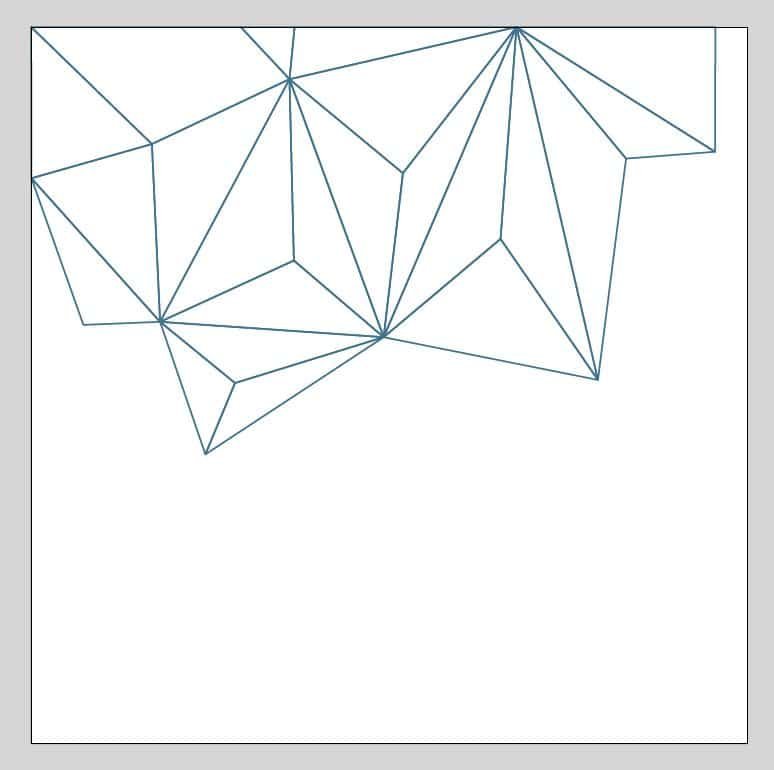
We advise yous to obtain the design by creating triangle after triangle so you will not lose the right perspective.
Stride three : To select a palette of colour.
Now await for a adept color palette. Usually, for this type of images metallic and night colors are used, but you tin experiment with equally you wish.
 RGB : 255 255 255
HSB : 0º 0% 100%
CMYK : 0% 0% 0% 0%
WEB : # FFFFFF
RGB : 174 200 213
HSB : 199º 18% 83%
CMYK : 42% 13% 17% 0%
Web : # AEC8D5
RGB : 56 110 136
HSB : 199º 58% 53%
CMYK : 91% 52% 41% 0%
WEB : # 386E88
RGB : viii 50 70
HSB : 199º 88% 27%
CMYK : 98% 85% 57% 32%
WEB : # 083246
RGB : 0 30 44
HSB : 199º 100% 17%
CMYK : 95% 88% 63% 56%
Spider web : # 001E2C
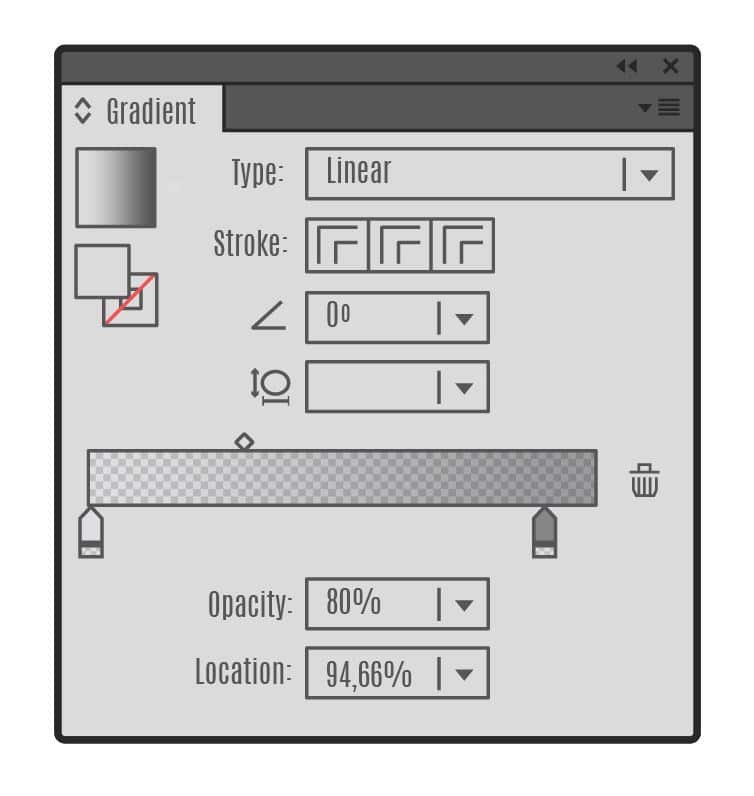
Step four : To apply the color.
The base color will not exist flat, it will accept a linear gradient (cmd + F9) for each side of each triangle. The slope of the base must not end in manifestly blackness or white.

Open some other layer and block this one.
Footstep 5 : To increase intensity of the shades.
In this step you will empower blackness so you tin can create more than volume. In order to do this, copy the face of the triangle on which yous will piece of work further.
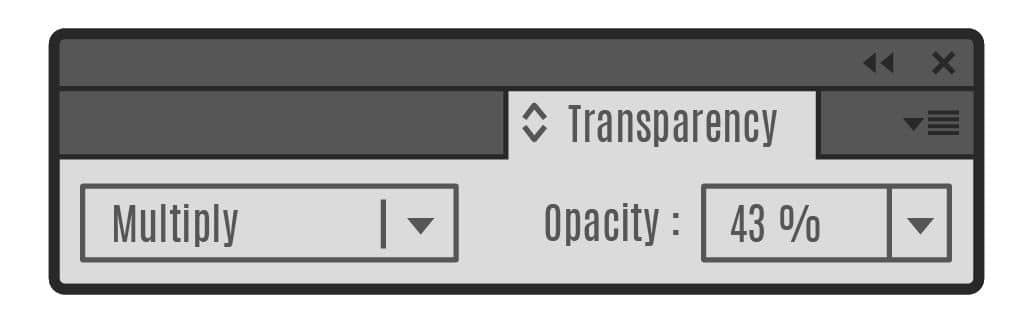
Apply a linear gradient (cmd + F9) from white (0% opacity) to black (between 80% and 100% opacity).
To finish this footstep, go to "Transparency" (Shift + cmd + F10) and apply blending way "multiply" and change the opacity until it is well integrated.

Create a new layer (cmd + L) and make a shape similar the artboard. This shape you can color in black and nighttime blueish equally in the example (or the nighttime shades of the color palette you use). Use an opacity (between 40 and 65%, approximately) and a blending mode "multiply".

Step 6 : To increment intensity of the lights.
Open up another layer (cmd + Fifty).
Now let'south heighten smooth. For this you must make a shape that fits the triangle. This shape must cover approximately half of the triangle. Apply a linear gradient (cmd + F9) from white (between 70% and 100% opacity) to black (0% opacity) to this shape.
So go to "Transparency" (Shift + cmd + F10) and apply Screen mode and alter opacity until it fits best.

Final Step : To align the nodes
To finish, if you lot want to change the position of some of the points all you have to is (cmd + Y) to select the nodes and move them with the white pointer.
This helps also in properly aligning (Shift + F7) the nodes and to avoid leaving voids or unwanted lines.

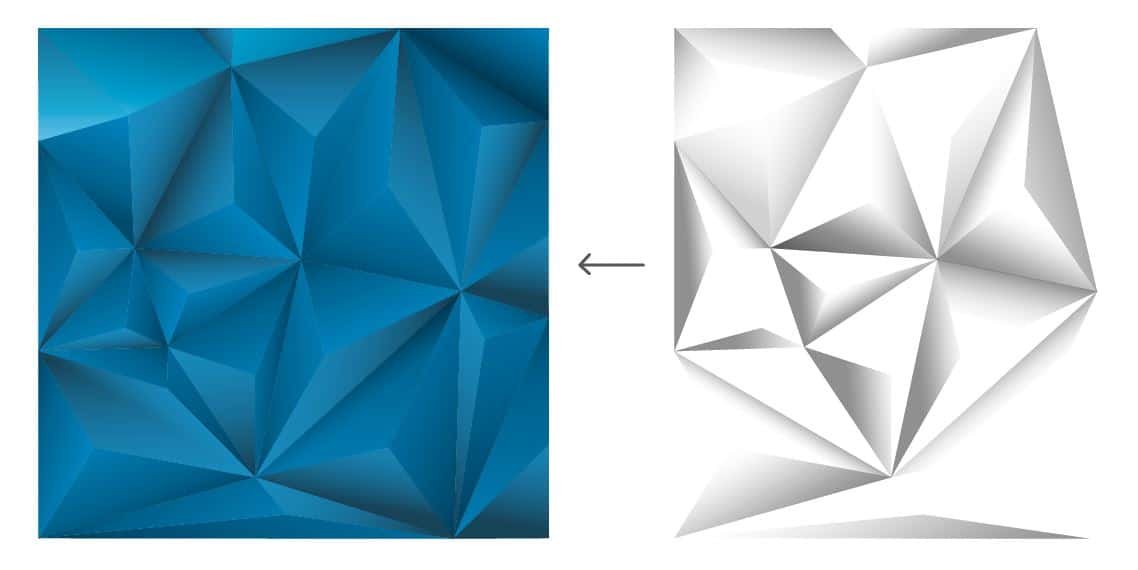
Final result
You take the terminal file on Freepik.com: Download at present
Like Posts:
Source: https://www.designcrawl.com/tutorial-vector-3d-triangle-effect/
Post a Comment for "3d triangle drawing to cut out template"